Want to learn how to create online courses in wix? Well you’ve come to the right place. Online courses are a cost effective, customizable alternative to traditional classroom learning. They can be created and delivered by private individuals or institutions. Wix’s user-friendly platform is a great choice for starting an online business, but it’s not optimized for eLearning. Fortunately, with Owwlish, you can easily create and organize your course content, including photos and videos, and sell your classes on your Wix site.
Before proceeding with the steps below, ensure that you have already created your course in Owwlish. It’s so easy and straightforward. You only need to outline your course lessons beforehand and simply organize them in Owwlish. You also have the option to add photos and videos making your course more engaging!”
CREATE ONLINE COURSES IN WIX WITH OWWLISH
Step 1: Create a new personal Wix account

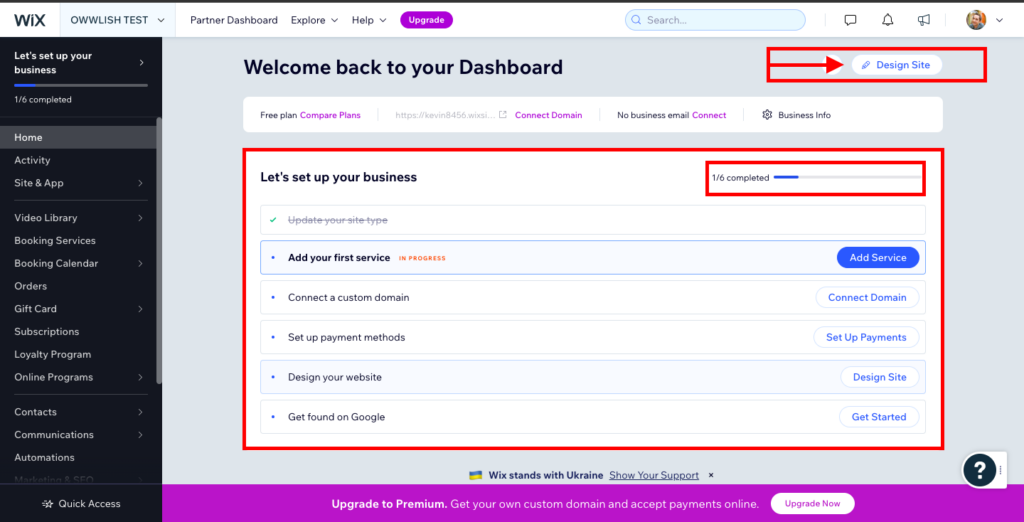
After Creating a new account, you need to complete setting up your account then Design Site after filling in necessary information.
Step 2: Create a New Page On Wix To Add Your Owwlish Course
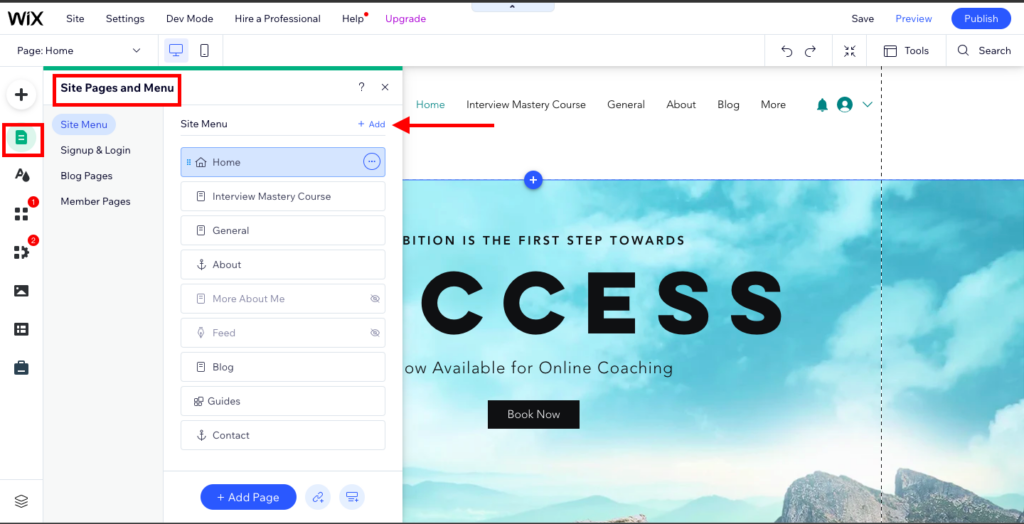
After completing necessary registration, Next is to simply create a new page on Wix to add your Owwlish course depending on your Preference.
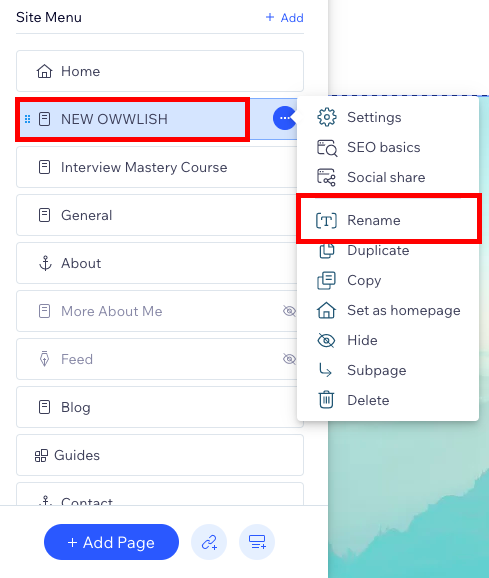
To do this, First you go to Design Site as seen in the screenshot above then go to Site Pages & Menus at the left pane of the wix site and click on Add Page at the site menu. After adding the Page, Rename it to your preferred name or your course name.
Step 3: Embed Code From Owwlish and Upload Your Lessons
Next Step is to Embed your Code and here’s how to do that:
- Go to Add (+) by the left pane and click on Embed Code, then click Embed HTML as seen in the picture below.
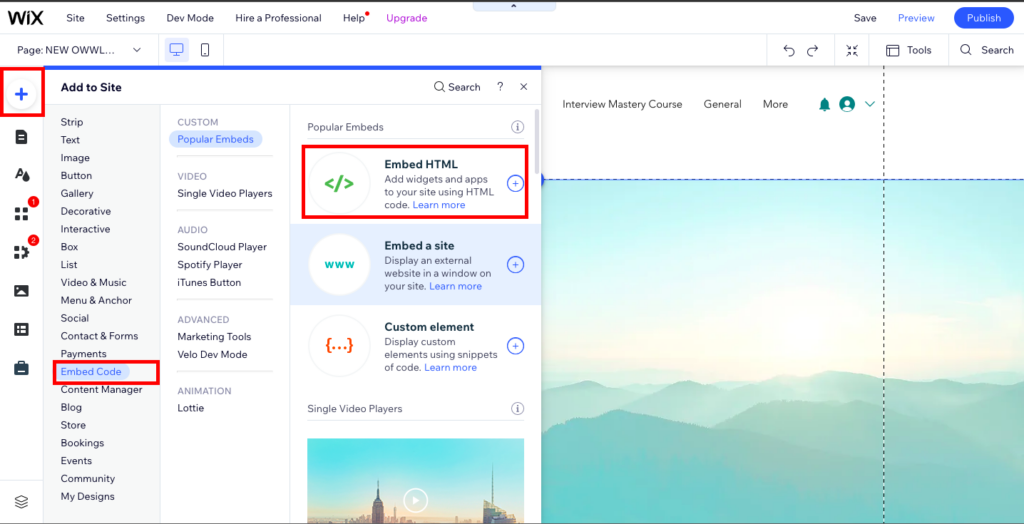
2. After clicking on “Embed HTML”, an IFrame pops out together with the HTML settings.
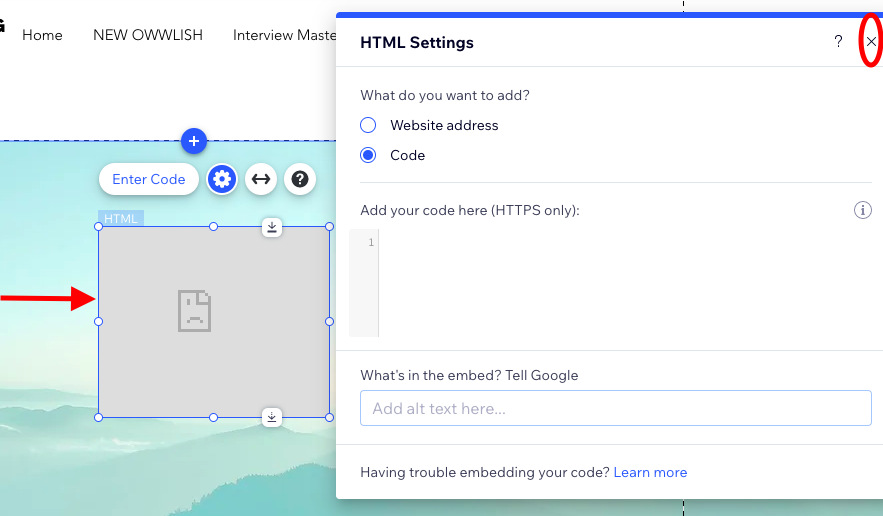
3. Close the HTML settings box and focus on the IFrame beside it, Enlarge the Iframe and make it wide across the page. Like this:
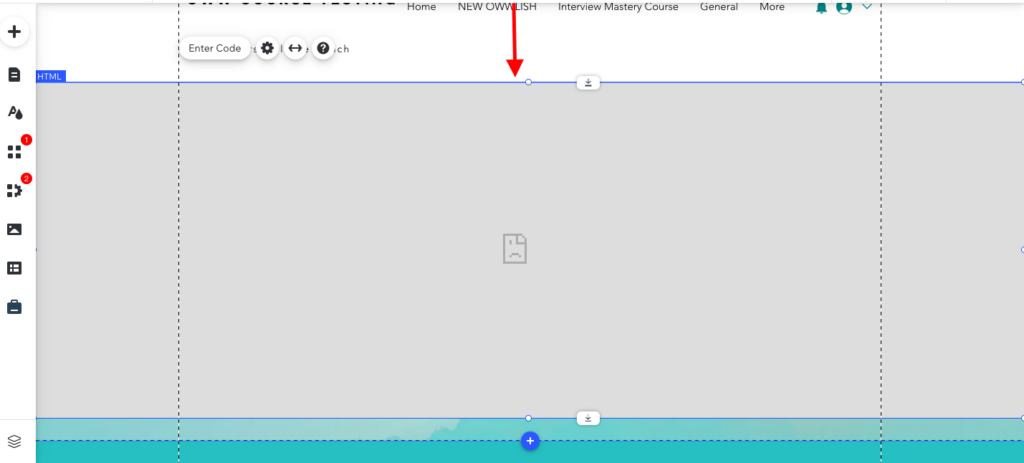
4. After doing this then you will go to your Owwlish Course and Integrate the course you want to. To do this:
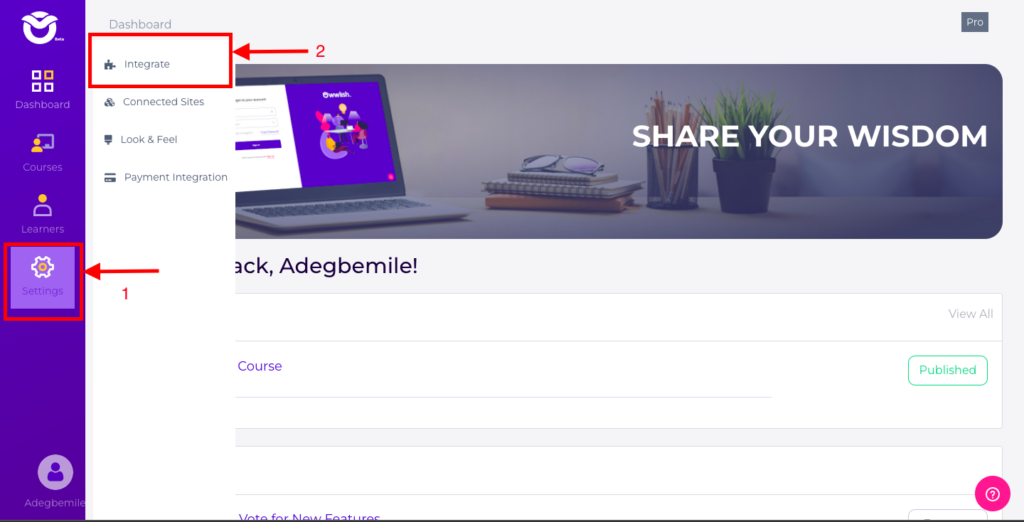
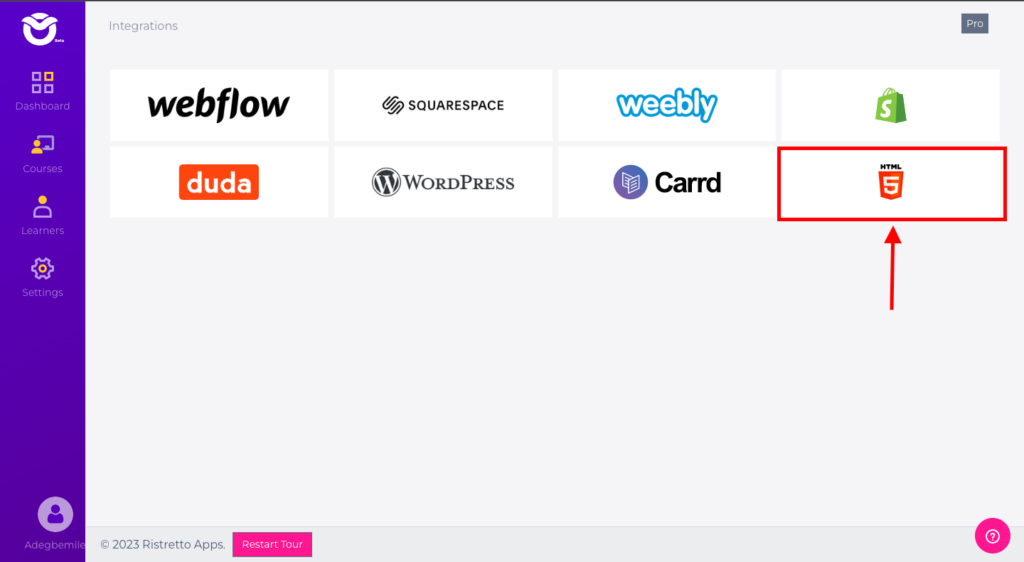
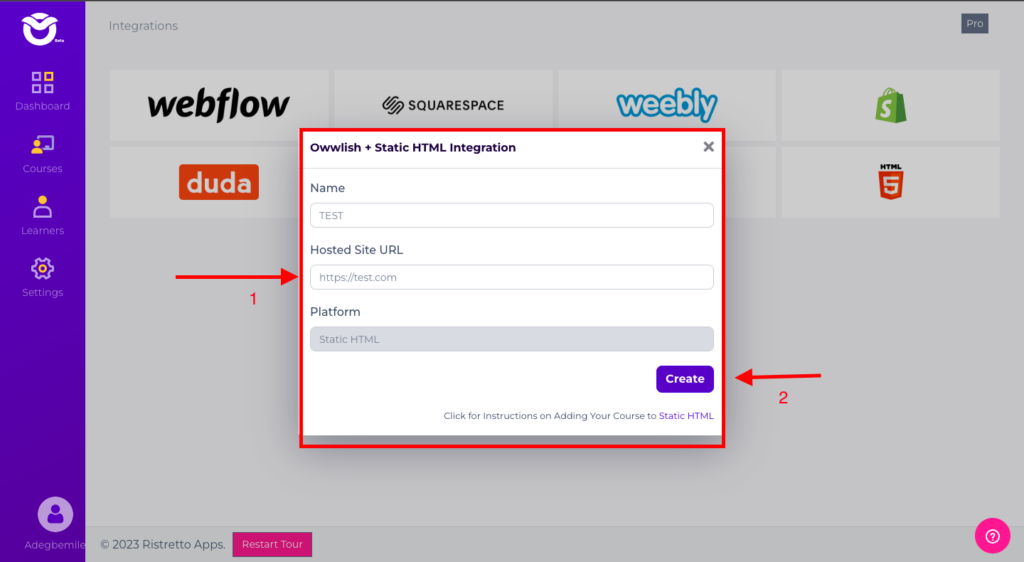
- Log in to Owwlish, then go to Settings and click Integrate. Choose HTML5 from the platforms provided.
- In the popup, enter a nickname for your website (anything you want) and enter “https://test.com “as the URL(This would be changed after to the Wix Course URL). Next, click the Create button.
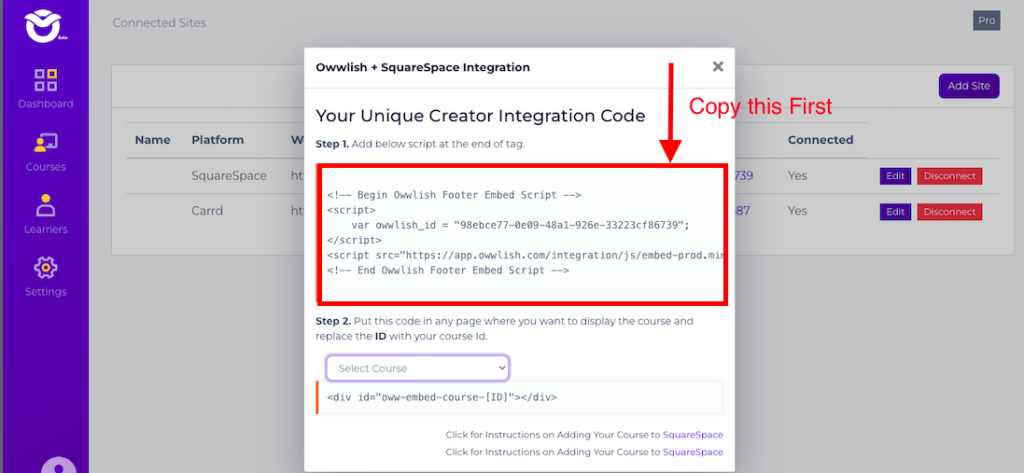
- You’ll be taken to the Connected Sites page (also accessible in the Settings menu). Look for the nickname of the HTML integration you recently created, and click on its Client ID, which should be a long string of random characters.

- In the popup copy the entire script from Step 1 which you’ll be soon be pasting into your Wix site:
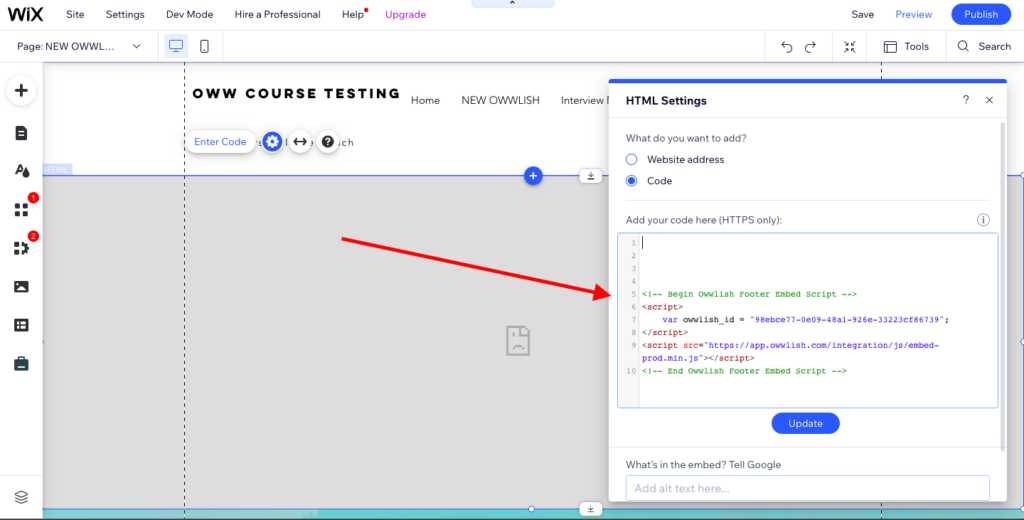
- The go back to Wix site and double click the Iframe and enter copied code and paste here:
- Then go back to owwlish to copy the second code, before you copy it, select the course you want to publish on Wix from the drop down list and copy the code.

- Then Paste the code above the first code on wix and click Update:
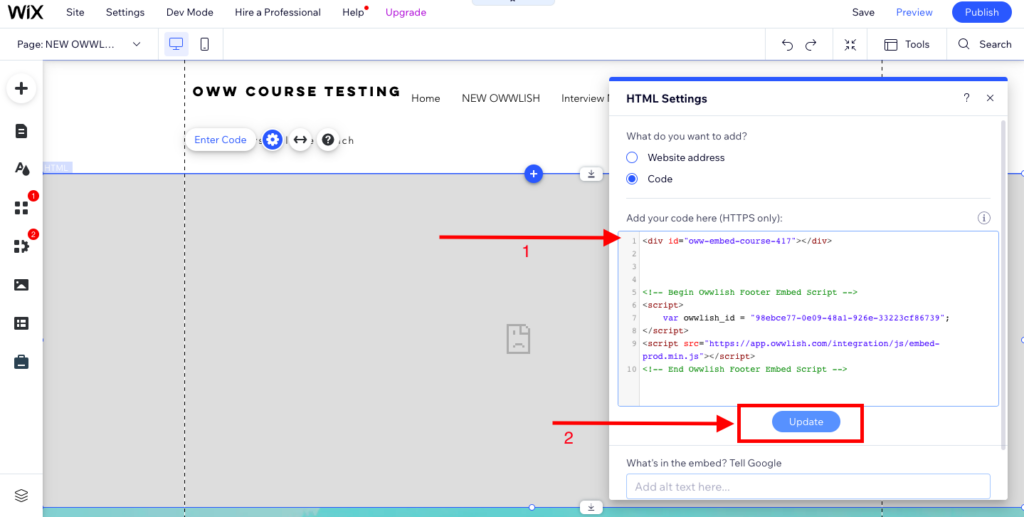
After you click update, you can close the HTML settings box if it does not close on its own then you will see an error message on the screen saying “URL Mismatch” but don’t worry, we are almost done
- Now, we will go ahead to publish by clicking on the publish button at the top right corner

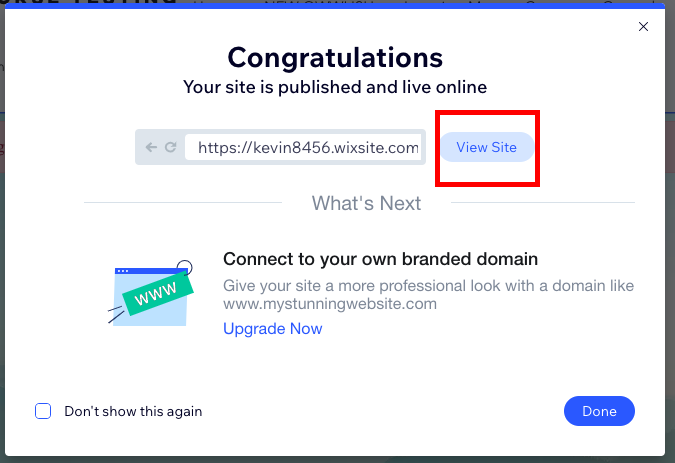
- After publishing, you’ll get a congratulatory message box with a link to View Site. Click the view site
Step 4: Get Unique URL To Completely link the Owwlish Course
Thank you for reaching this far, The final step is to get a unique URL from the Wix Published site and replace the initial URL “https://Test.com” we used on Owwlish as stated in step 3
To do this:
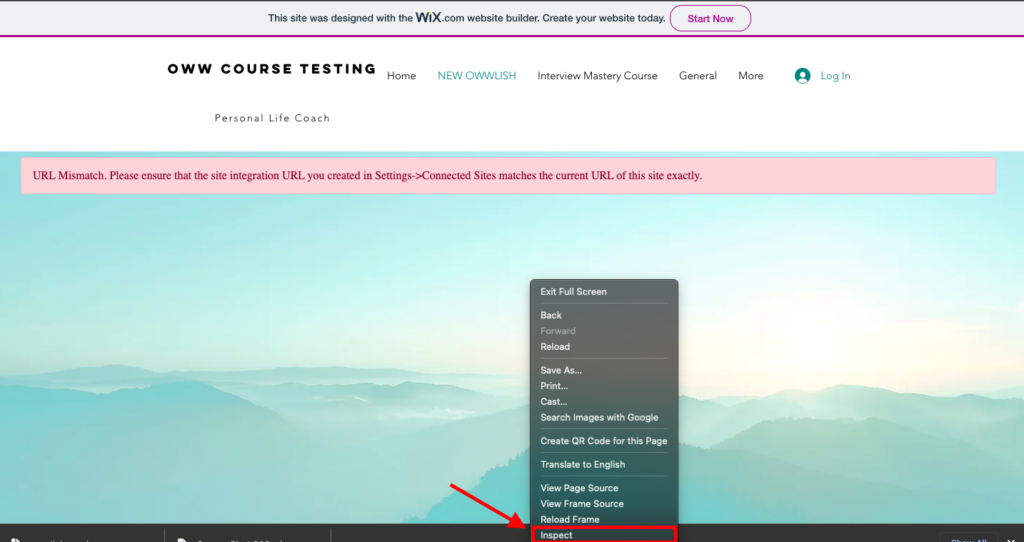
- On our Published Wix site, you right click anywhere on that page and click on Inspect.
- Then click Select Element as seen in this image below
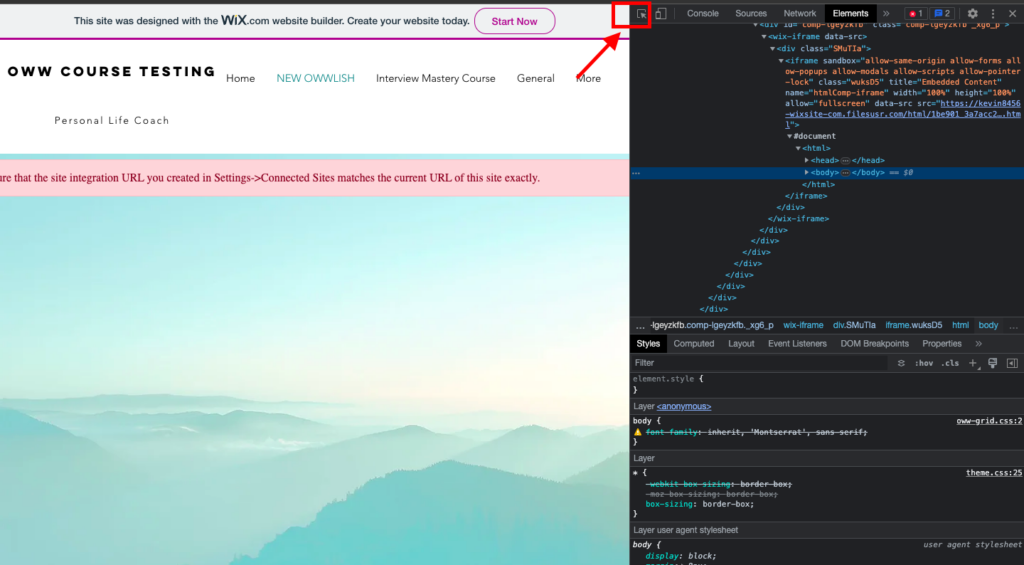
- Then After clicking on the button above then click on the error message on the Wix page and it automatically takes you to the code backing that error.
Now look at the code closely till you see “IFrame” somewhere within the code like this:
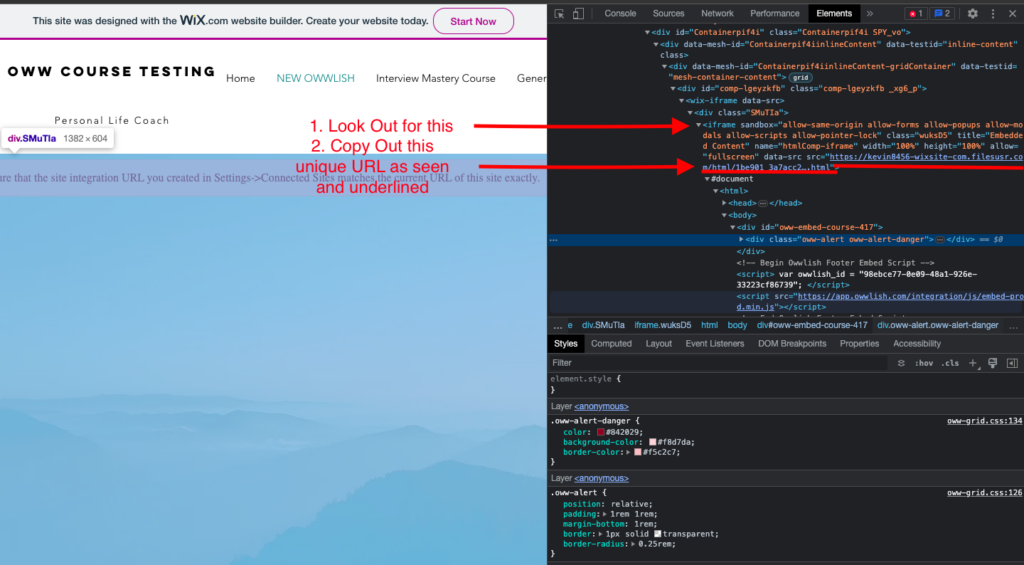
- Now go back to Owwlish, Click Settings then Click connected site. Then replace the initial “https://test.com” to the one you copied from the code above and paste it and update settings.
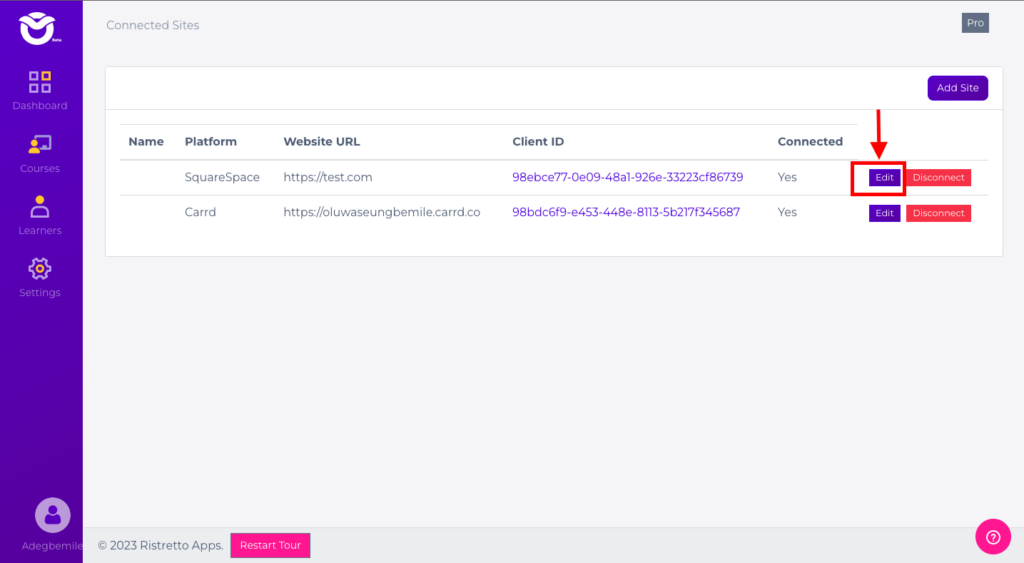
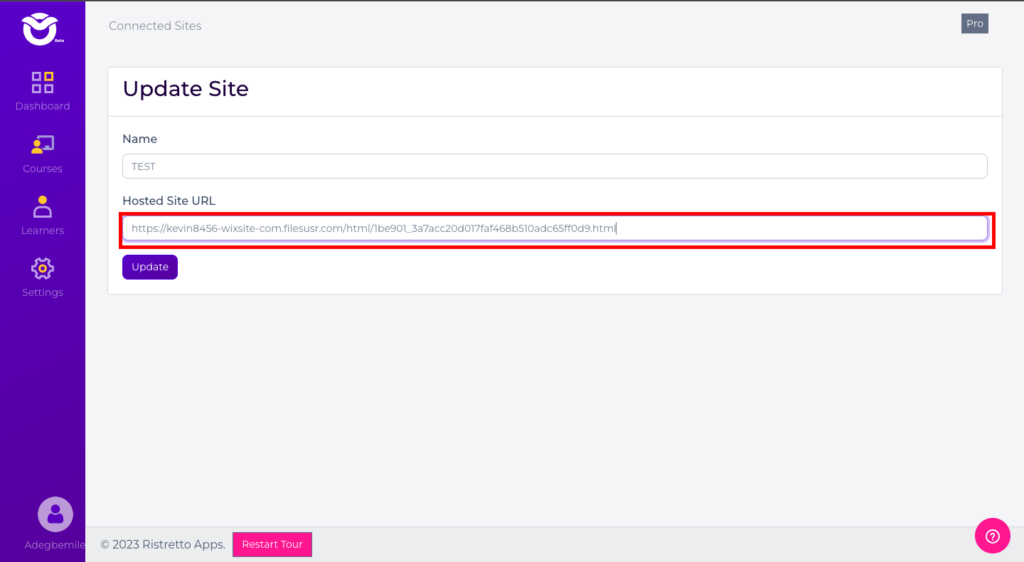
Now click update.
- Finally, you can now reload the Wix Site and You can now view your Owwlish course in your Wix page.
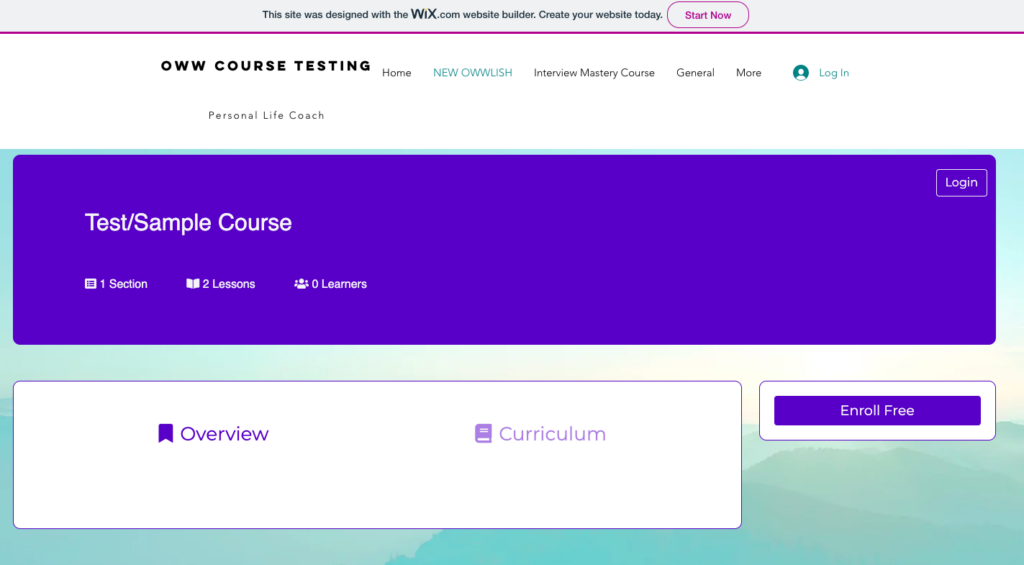
Voila! No-fuss, no need to migrate, and no extensive coding required to create online courses. All you need is one reliable LMS integrated into your site, and you just turned a section of your online store into an online school.
It’s Time to Start Building Your Online Course
In a world where digital learning is rapidly becoming the norm, harnessing the power of online courses has never been more essential. Whether you’re an educator, entrepreneur, or enthusiast eager to share your expertise, Owwlish is your go-to platform for seamlessly creating and offering engaging online courses on your Wix website. While Wix itself is an exceptional tool for crafting your online presence, Owwlish steps in to elevate your eLearning journey to new heights. With an intuitive approach, you can design, structure, and present your course content, from multimedia lessons to interactive quizzes, all while keeping your audience engaged. Owwlish’s integration with Wix brings the world of eLearning right to your fingertips, offering a user-friendly experience that ensures your courses reach and inspire a global audience.
Don’t miss out on the opportunity to tap into the dynamic world of online education with Owwlish – the key to effortlessly transforming your Wix site into a thriving online learning hub. Start your journey today, and empower your audience with knowledge in the most accessible and engaging way possible. Your course creation adventure begins now!
Related Article: How To Build An Online Course In Weebly With Owwlish


