
Trying to learn how to host online courses in Bubble? Well you have come to the right place! Here is our step by step guide on how you can easily host online courses in Bubble. With online courses being popular, online course creators are looking for platforms to not only create applications related to their services but also an option to host online courses that do not involve complex coding. One of these options is Bubble – a no-code app development platform.
While Bubble offers a lot of development features, it has not offered an easy option to host online courses. This is where Owwlish comes in, a new learning management system (LMS) that lets you to easily create online courses that anyone can access. And the best part? It integrates with Bubble so you no longer have to create everything from scratch. Here’s how you can host Online Courses using Bubble website.
Host Your Online Courses in Bubble
Step 1: Create Owwlish account
Sign up and create your Owwlish account. You don’t need to know anything about web design or coding because Owwlish’s course builder takes care of all of that for you. You can create a course in minutes and publish them right away.
Step 2: Create Owwlish course
Owwlish’s course builder does not require any third-party apps, so you can do everything in one place. It includes a variety of tools for adding different types of content. Videos, and articles are all easy to add. Actually, one of its course builder’s important features is the option to embed multimedia from popular sites like YouTube and Vimeo.
Simply create your course, input all your lessons and you are ready for the next step!
Step 3: Integrate Owwlish and Host Your Courses
Finally! You’ve set up your Owwlish account and created your online course. Now it’s time to integrate your Owwlish account with your Bubble. You will have to be subscribed to one of the paid plans of Bubble for this to work. Here’s how to do it!
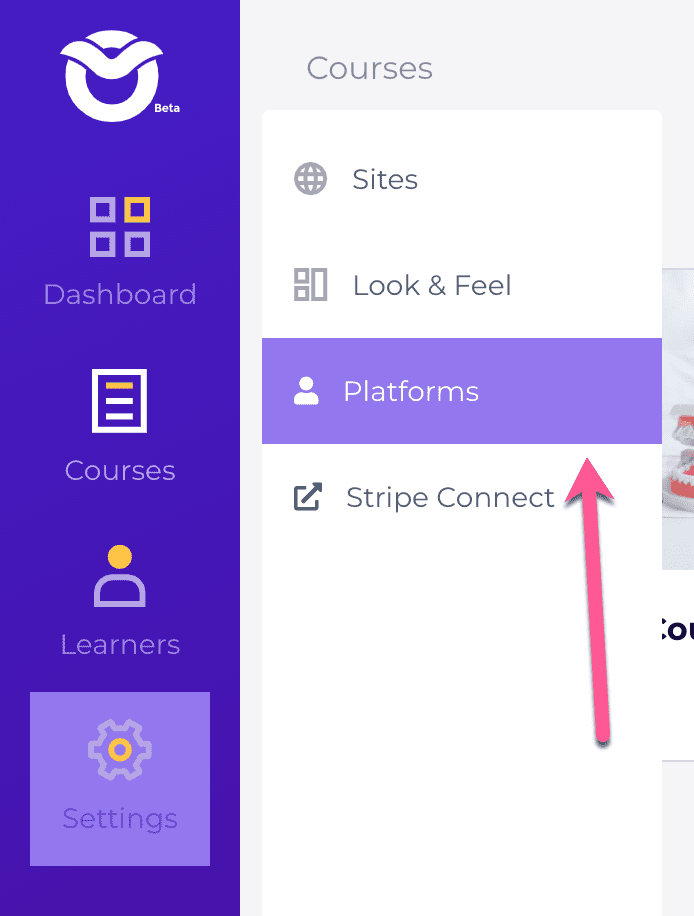
- Log in to the Owwlish app and on the right sidebar menu, click on Settings and select Platforms.
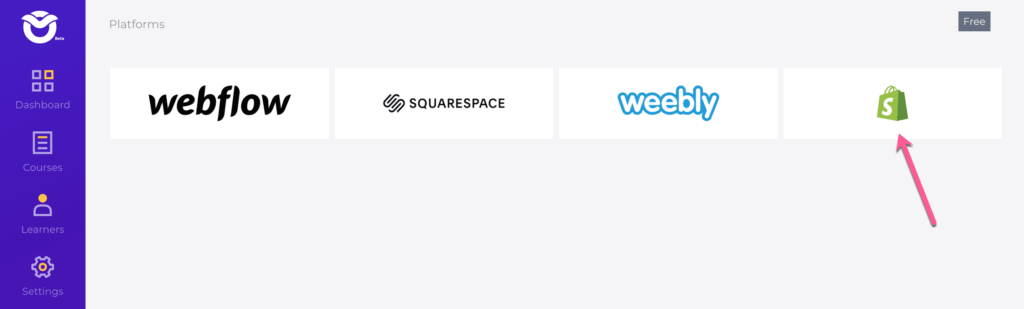
- At the moment, you may select any platform from the list provided. We will be adding Bubble in the future to our Platform list in our next app update.
- Name your integration in any name you like and input the URL of your Bubble app/site under Hosted Site URL.
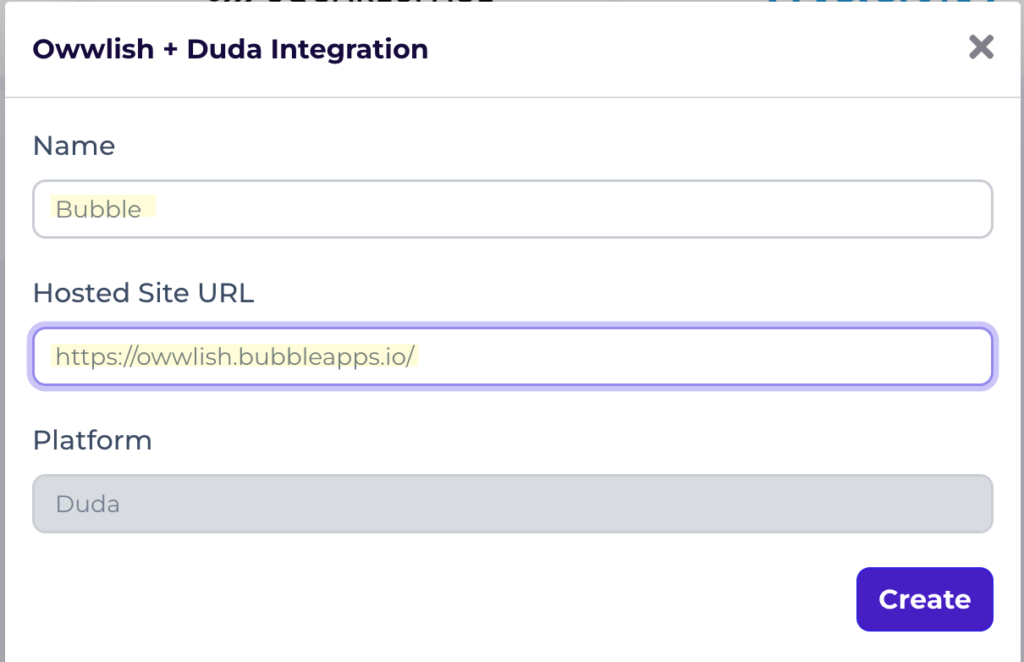
- Click on Create to save changes.
- After that, you’ll be taken to a new page where you can access the websites you’ve linked to your Owwlish account.
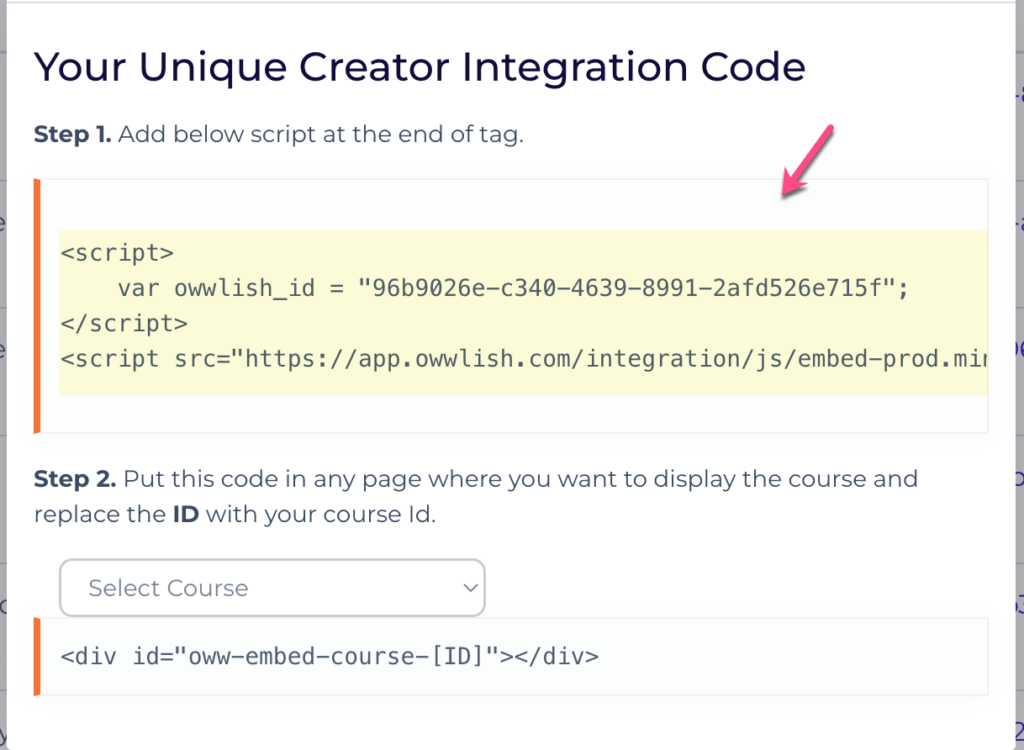
- Look for the name of your Bubble integration and click on the Client ID link. An integration popup box will open, from there you can grab your unique creator integration code which you will be pasting in Bubble.

- Go to Bubble and edit your app. Once there, click on Settings and then click on SEO/metatags tab.
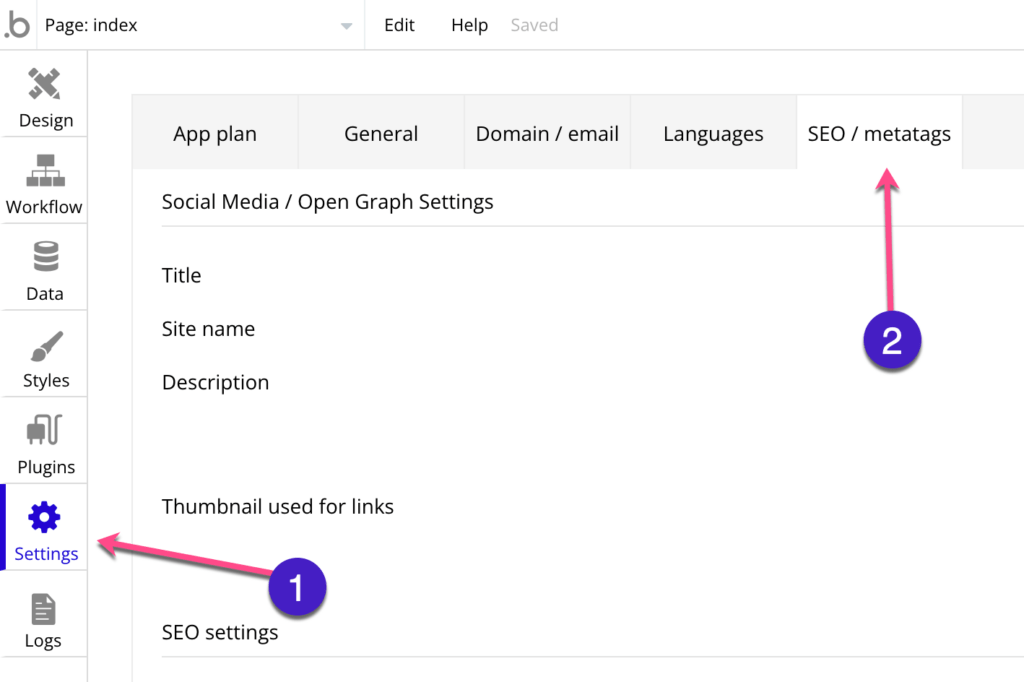
- Head over to Advanced Settings and locate SEO/metatags. Paste the integration code from the popup box under Script/meta tags in header. This code should be under Step 1 and should be in the following format:
<script>var owwlish_id = 'XXXXXXXX-XXXX-XXX-XXXX-XXXXXXXXXX';</script>
<script src="https://app.owwlish.com/integration/js/embed.js"></script>

- Ensure that the changes you have made are successfully saved!
Final Steps in Hosting your Owwlish Course in Bubble
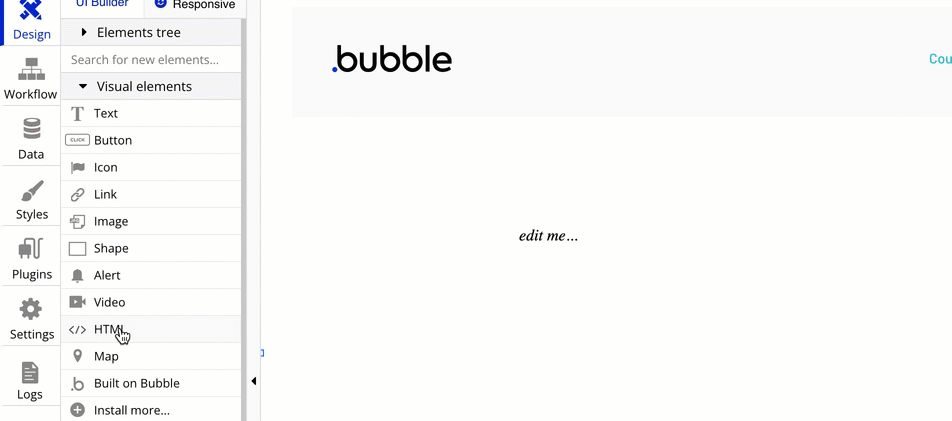
- Select the page from your Bubble app where you like to host your Owwlish course in.
- Once there, add a HTML block.
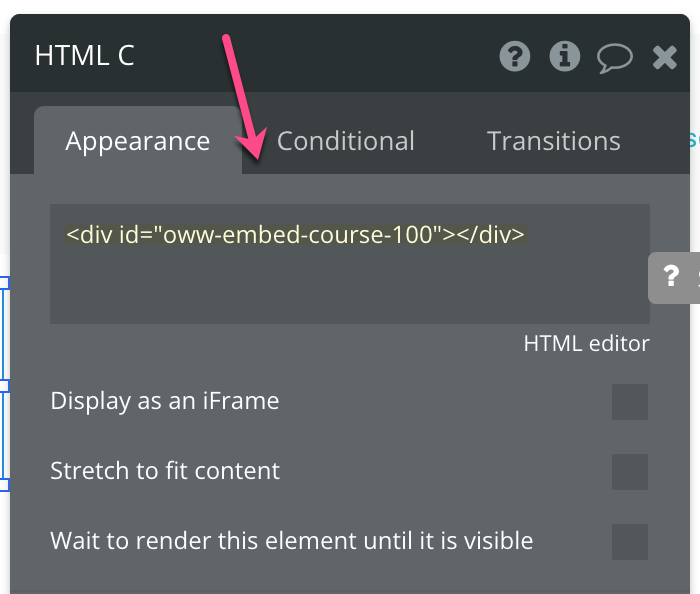
- Go back to the integration pop-up box, and under Step 2, select the course you would like to host from the drop down. A new course code will be generated for you after.

- Copy the newly generated course code and paste it in the HTML code block you have just added to your Bubble page.
- Save changes and you have successfully hosted your Owwlish course!

Course hosting in Bubble with Owwlish is easy and affordable. The platform is user-friendly and provides everything you need to create and deliver a successful course. Plus, there are many helpful tutorials and support options available if you need help getting started. So what are you waiting for?